


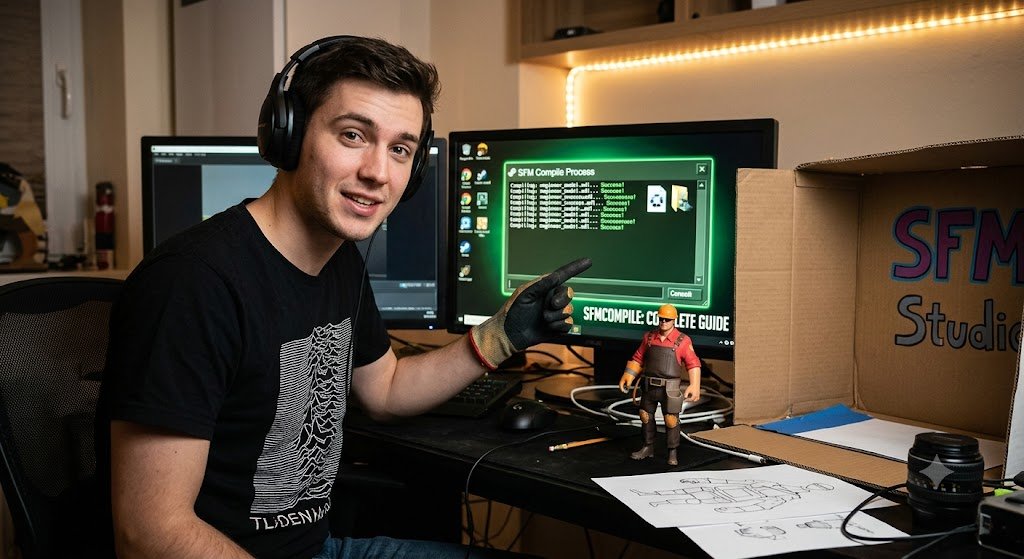
Sfmcompile is commonly used as a shorthand search term for the process of preparing and compiling custom assets for Source Filmmaker. At first glance, that process can look unnecessarily technical. You may have a finished 3D model, clean textures, a working skeleton, and even completed animations, yet Source Filmmaker still refuses to load the asset correctly.
That happens because Source Filmmaker cannot use every raw 3D file directly.
A model created in Blender, Maya, 3ds Max, or another modeling application must be converted into the formats and folder structure understood by the Source engine. Valve’s documentation describes model compilation as the stage that converts source files, configuration instructions, and supporting resources into a model that can be used by the engine.
This guide explains the full workflow without hiding the difficult parts. You will learn what gets compiled, how the files relate to one another, why common errors occur, and how to build a repeatable process that does not collapse whenever you change a texture or rename a folder.
What Is Sfmcompile and What Does It Actually Do?
Sfmcompile refers to the asset-compilation workflow used to turn editable 3D source files into assets that Source Filmmaker can recognize.
Source Filmmaker itself is Valve’s filmmaking tool built inside the Source game engine. Because it works with engine assets rather than ordinary video-production files, custom models must follow Source-specific requirements. Valve notes that SFM can use models, maps, animations, sounds, and effects from its existing content library while also supporting imported community assets.
Compilation acts as the bridge between your modeling software and SFM.
A typical model project may include:
- A visible mesh
- A bone hierarchy
- Skin weights
- Texture coordinates
- Material references
- Collision or physics information
- Facial flexes
- Animation sequences
- Attachment points
- Body groups
- Level-of-detail settings
These pieces are not simply placed into one folder and opened in SFM. They are processed according to instructions contained in a QC file, then converted into the model files used by the engine.
The final output normally includes an .mdl file plus several related files that store geometry, vertex, physics, and animation data. The exact output can vary according to the model and compiler.
Why Sfmcompile Matters for Custom SFM Models
A raw model may look perfect in Blender but fail completely in Source Filmmaker. That does not necessarily mean the mesh is damaged. It usually means the asset has not been translated correctly into the Source pipeline.
Successful compilation allows SFM to understand:
- Where the model should appear in the asset browser
- Which material files it should use
- How the skeleton should move
- Which animations belong to the model
- Whether the model has physics data
- Where props or effects should attach
- How facial controls should behave
- Which parts can be hidden or swapped
This is why compiling is more than file conversion.
It is a validation step.
The compiler checks whether the source files, paths, bones, material names, and QC instructions form a usable Source model. When something is inconsistent, the compiler may stop with an error or generate an asset that behaves incorrectly inside SFM.
Files You Need Before Starting Sfmcompile
A clean compile begins long before you press the Compile button. Most frustrating errors are created during export, naming, or folder setup.
1. Mesh source file
The mesh contains the geometry of your model. Source workflows frequently use formats such as SMD or DMX for model source data. Valve’s model-compilation documentation identifies source files, a QC script, and the compiler as the principal components of a model compile.
Depending on your export tools, the mesh file may also contain:
- Bone assignments
- Vertex weights
- UV coordinates
- Shape data
- Reference-pose information
Check the exported file rather than assuming the export succeeded. A model can look correct in the original scene while the exported version contains missing bones, unapplied modifiers, or incorrect transforms.
2. Skeleton and rig
Animated characters need a consistent bone hierarchy.
Bone names must remain stable from the reference mesh through every animation export. If an animation contains missing, renamed, duplicated, or reordered bones, the compile may fail or the model may deform after loading.
Before export:
- Apply the required transforms.
- Remove unused bones where appropriate.
- Confirm the root-bone structure.
- Check weight painting.
- Test extreme poses.
- Keep bone names identical across files.
Do not treat the rest pose as a minor detail. The reference pose establishes the relationship between the mesh and the skeleton.
3. Material files
Source models generally rely on VMT material definitions that point to texture resources such as VTF files.
The model does not search your computer for the original PNG, JPEG, PSD, or Blender material. It follows the material paths compiled into the asset.
That distinction explains one of the most common SFM problems: the bright pink-and-black checkerboard. It usually indicates that the material or texture could not be found.
4. Animation files
Animations are normally exported separately from the reference mesh and then declared in the QC.
Each animation should use the expected skeleton. Keep names short, consistent, and descriptive.
For example:
idle.smdwalk.smdrun.smdtalk.smdreference.smd
Avoid building your first test around dozens of animation sequences. Compile the reference model and one simple sequence first. Add complexity only after the basic asset works.
5. QC file
The QC file is the instruction sheet for the compiler.
It can define the model name, source mesh, surface properties, material directories, animation sequences, collision model, attachments, body groups, flexes, and many other behaviors.
A simplified QC might look like this:
$modelname "custom/character/character.mdl"

$body "Body" "character_reference.smd"

$cdmaterials "models/custom/character/"

$surfaceprop "flesh"

$sequence "idle" "character_idle.smd" loop fps 30
This example is intentionally minimal. A production character may need far more configuration.
How to Complete an Sfmcompile Workflow Step by Step
The safest approach is to build the asset in controlled stages.
Step 1: Prepare the model in your 3D application
Clean the scene before export.
Delete hidden test objects, duplicate meshes, unused materials, accidental cameras, unnecessary lights, and abandoned rig components. Apply transforms where required by the exporter and verify the model’s orientation and scale.
You should also triangulate or validate geometry according to the needs of your export pipeline. Do not assume the engine will interpret complicated geometry exactly as your modeling program does.
Step 2: Check UVs and material assignments
Every visible area should have intentional UV mapping.
Review material slots carefully. Material names used by the model must match the Source material setup. A single typo can send the compiler or engine to the wrong path.
Use predictable names such as:
character_bodycharacter_facecharacter_eyescharacter_clothes
Avoid vague names like Material.001 or NewMaterialFinal2.
Step 3: Export the reference mesh
Export the model in the rest pose using a Source-compatible exporter.
After export, inspect the process for warnings. Confirm that the expected mesh, bones, weights, and material names are present.
A practical habit is to create a tiny test project before touching your complete production folder. This separates model problems from path and configuration problems.
Step 4: Export animations separately
Use the same skeleton and bone names for every sequence.
Set the correct frame range and frame rate. Remove unintended keyframes outside the animation range. Check whether the exporter includes the reference pose or inserts extra frames.
For looping motion, inspect the first and last frames carefully. A technically successful compile does not guarantee a visually seamless loop.
Step 5: Convert and organize textures
Prepare textures for the Source material system and place them inside the proper materials directory.
Your folder structure might resemble:
game/
└── usermod/
    └── materials/
        └── models/
            └── custom/
                └── character/
                    ├── character_body.vmt
                    ├── character_body.vtf
                    ├── character_face.vmt
                    └── character_face.vtf
The path inside $cdmaterials should align with this structure.
Keep source artwork in a separate working directory. Your editable PSD, Krita, Substance Painter, or high-resolution image files should not be mixed carelessly with the final game-ready materials.
Step 6: Write the QC configuration
Start with the smallest QC that can produce a visible model.
Define:
- The final model path
- The reference mesh
- The material directory
- The surface property
- One basic sequence
Compile that version first.
Once it loads properly, add collision data, advanced animations, body groups, flex controllers, attachments, procedural bones, or other features.
This staged approach turns debugging into a logical process instead of a guessing game.
Step 7: Compile the model
Source model compilation has traditionally relied on StudioMDL, while community tools such as Crowbar provide a more accessible interface for compiling and decompiling Source models.
When using a graphical tool, confirm:
- The selected game is Source Filmmaker.
- The game path is correct.
- The QC file is the intended version.
- Input files are accessible.
- Output folders are writable.
- File paths do not point to an old project copy.
Read the complete compiler log.
The final error line is not always the original cause. Earlier warnings may reveal the first broken file, missing path, invalid bone, or unsupported instruction.
Step 8: Test inside Source Filmmaker
Launch SFM and search for the model through the model browser.
Do not stop after confirming that the model appears. Test it thoroughly.
Check:
- Materials
- Scale
- Orientation
- Bone controls
- Animation sequences
- Facial flexes
- Attachments
- Body groups
- Shadows
- Transparency
- Normal maps
- Collision behavior
Valve’s Workshop documentation also emphasizes compiling and validating models before distribution.
How to Fix Common Sfmcompile Errors
Compiler errors often look mysterious because they describe a technical symptom rather than the workflow mistake that created it.
Model compiles but does not appear
First check $modelname.
The output may have been written to a different directory than expected. Search the relevant models folder for the generated files and confirm that SFM is mounting the same content directory.
Also restart SFM or refresh the model browser when necessary.
Pink-and-black missing textures
This almost always points to a material-path problem.
Check:
- The VMT file exists.
- The referenced VTF exists.
$cdmaterialsuses the correct directory.- Material names match the exported mesh.
- Folder names are spelled consistently.
- The VMT’s
$basetexturepath does not include an incorrect extension or directory.
Capitalization may also become important when assets are moved between file systems or packaged for different environments.
The model is invisible
An invisible model may result from:
- Missing geometry
- Incorrect scale
- Reversed normals
- A broken material
- Incorrect transparency settings
- A misplaced origin
- Failed export
- The model being located far from the expected coordinates
Test the exported reference file and compile a basic untextured material if needed. This helps determine whether the fault is in the geometry or material setup.
Bones move incorrectly
Bone problems often begin with inconsistent reference data.
Verify that:
- Animation files use the same skeleton.
- Bone names have not changed.
- The reference pose is consistent.
- Weights are normalized appropriately.
- Parent-child relationships remain unchanged.
- No exporter silently removed required bones.
Do not fix every deformation by editing the QC. Some problems belong in the rig or weight painting and must be corrected before compilation.
The compiler cannot find an SMD or DMX file
The path in the QC is wrong or the file is not where the QC expects it to be.
Use a simple project structure. Avoid excessively deep directories, confusing duplicate exports, and multiple files with nearly identical names.
The Source Filmmaker community regularly encounters missing-file errors when Crowbar or StudioMDL cannot resolve animation and model paths.
The compile succeeds with warnings
A successful output does not mean every warning is harmless.
Some warnings affect features you are not currently testing. Others may create visual corruption, missing animations, unstable physics, or compatibility problems later.
Classify each warning:
- Expected and understood
- Feature-specific but acceptable
- Unexplained and requiring investigation
Never ignore a warning simply because the model appeared once.
Sfmcompile Folder Structure That Prevents Mistakes
A reliable project separates editable source content from compiled game content.
project/
├── source/
│   ├── blender/
│   ├── textures/
│   ├── exports/
│   ├── animations/
│   └── qc/
├── game/
│   └── usermod/
│       ├── models/
│       │   └── custom/
│       └── materials/
│           └── models/
│               └── custom/
└── backups/
This structure provides three advantages.
First, you always know which files are editable originals. Second, generated files do not overwrite valuable source work. Third, packaging becomes easier because the files intended for SFM are already separated.
Create versioned backups before major rig, QC, or material changes.
For example:
character_qc_v01.qc
character_qc_v02_flexes.qc
character_qc_v03_collision.qc
Once a version is stable, preserve it rather than continuously overwriting the only working configuration.
How to Improve Sfmcompile Performance and Reliability
Compilation speed matters, but reliability matters more.
A fast process that generates inconsistent assets will waste more time during animation and rendering.
Compile one change at a time
Do not replace the rig, textures, materials, animations, and QC simultaneously.
Make one meaningful change, compile, and test. When a problem appears, you will know which stage introduced it.
Keep a known-good test model
A tiny model with one material and one animation can verify that your compiler, game path, and content folders are functioning.
If the test model compiles but the production model fails, the environment is probably working and the issue is project-specific.
Use source control
Git or another version-control system is valuable even for individual artists.
Track:
- QC files
- Material definitions
- Export scripts
- Text-based configuration
- Documentation
- Packaging instructions
Large binary source files may need a suitable large-file strategy, but configuration history alone can save hours of recovery work.
Study working assets carefully
Examining a legally accessible, working Source model can clarify folder organization and QC structure. Community tools are often used to inspect or decompile models for learning and troubleshooting, but creators should respect licenses, Workshop terms, and asset permissions.
Use reference assets to understand the pipeline, not to republish someone else’s work.
Is Sfmcompile a Separate Performance Tool?
Search results sometimes describe Sfmcompile as a standalone optimization utility that automatically reduces crashes, compresses models, or makes Source Filmmaker run smoothly. Treat those claims cautiously.
The established technical meaning of SFM compilation is the conversion of source assets into engine-ready model files. Compilation can improve an asset when the creator reduces unnecessary geometry, corrects materials, builds sensible levels of detail, or removes inefficient data. However, merely compiling a model does not automatically optimize every project or repair unrelated SFM crashes.
Source Filmmaker stability can also be affected by:
- Scene complexity
- Memory limitations
- Large textures
- Excessive particle systems
- Broken Workshop assets
- Complex lighting
- High sample settings
- Corrupted sessions
- Conflicting content paths
Download unfamiliar tools only from sources you can verify. A tool using the Sfmcompile name should not automatically be assumed to be an official Valve product.
Best-Practice Sfmcompile Checklist
Before compiling:
- Confirm the model scale and orientation.
- Clean unused scene data.
- Verify UV maps and material assignments.
- Test the skeleton and weights.
- Keep bone names consistent.
- Export the reference mesh separately.
- Export each animation with the correct frame range.
- Organize Source materials correctly.
- Validate every path in the QC.
- Back up the latest working files.
After compiling:
- Read the complete compiler log.
- Confirm all expected output files were generated.
- Load the model in SFM.
- Test materials and normal maps.
- Move every important bone.
- Preview each animation.
- Test attachments and body groups.
- Check facial flexes where applicable.
- Review performance in a realistic scene.
- Package only the files users actually need.
Conclusion: Build a Repeatable Sfmcompile Pipeline
Sfmcompile becomes manageable when you stop treating it as one mysterious button.
It is a chain of connected stages: model preparation, rig validation, export, material conversion, QC configuration, compilation, and in-engine testing. Each stage has a specific responsibility. When you isolate those responsibilities, errors become easier to diagnose and successful results become repeatable.
Start small.
Compile a basic reference model with one material and one animation. Confirm that it loads. Then add collision data, body groups, facial controls, additional sequences, and advanced features one layer at a time.
The goal is not merely to achieve one successful compile. The goal is to create a clean production workflow that you can reuse for every future Source Filmmaker asset.
Frequently Asked Questions
1. What does Sfmcompile mean?
Sfmcompile generally refers to compiling custom models and related assets into formats that Source Filmmaker and the Source engine can read. The process uses source files such as SMD or DMX files, material resources, and a QC configuration file to generate an engine-ready model.
2. Do I need Crowbar for SFM model compilation?
Crowbar is not the only possible compiler interface, but many Source creators use it because it provides convenient tools for compiling and inspecting models. The underlying model-building process relies on Source compilation tools and a correctly configured QC file.
3. Why does my SFM model have pink-and-black textures?
Pink-and-black textures usually mean Source Filmmaker cannot locate or load the required material. Check $cdmaterials, VMT paths, VTF filenames, exported material names, folder spelling, and the $basetexture value inside each material file.
4. Can Sfmcompile reduce crashes and improve SFM performance?
Compilation alone does not guarantee better stability. A carefully optimized model can reduce unnecessary resource use, but SFM crashes may also come from complex scenes, large textures, particles, memory constraints, damaged sessions, or problematic Workshop assets.
5. Can I compile an OBJ or FBX directly for Source Filmmaker?
An OBJ or FBX file is usually imported into a supported 3D application and then exported through a Source-compatible workflow, commonly into SMD or DMX source data. The exported model is then compiled through a QC file into the formats used by Source Filmmaker.
